bowbridge Anti-Virus - Cloud - Quickstart Guide1.Overviewbowbridge Anti-Virus – Cloud is the first and only Hybrid-SaaS content security solution for SAP’s VSI API. Based on the de-facto standard solution for VSI, it combines bowbridge’s almost 20 years of VSI-experience with latest cloud-technology and delivers a solution that is lighweight on the SAP application server, fast and easy to deploy and manage, and built from the ground up for SAP workloads in the cloud. bowbridge Anti-Virus – Cloud consists of a lightweight client part, called the “VSA client”, which is deployed on individual SAP application servers – within 30 seconds. The client connects to a bowbridge-operated scan-cluster of your choosing to perform the scans according to your individual security policy. bowbridge operates scan clusters in several regions on every major hyperscaler infrastructure. All configurations, licenses and logs are managed and accessed via the bowbridge customer portal. This Quickstart Guide will illustrate the process of setting up the solution for an imaginary organization “ACME Laboratories”. Integration with on-premise systems, such as SIEM or quarantines for forensic analysis is possible. Please refer to the “Optional integrations” part of this guide for instructions on how to set them up.
2.PreparationsDownload the installer scriptbowbridge Anti-Virus requires a one-time OS-level installation of the VSA-client. Download the bowbridge-anti-virus Cloud Client installer from the bowbridge Web-site Download Section and transfer it to the application server(s) it needs to be installed to.
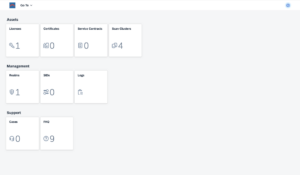
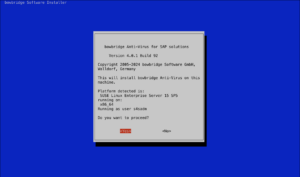
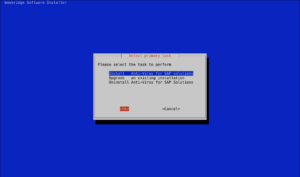
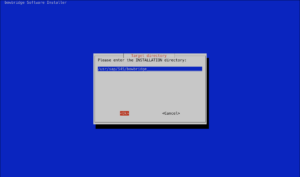
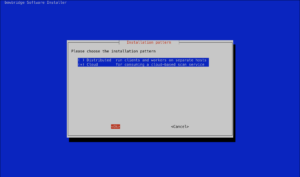
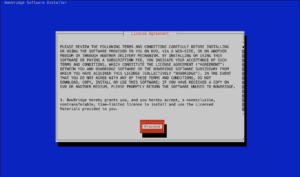
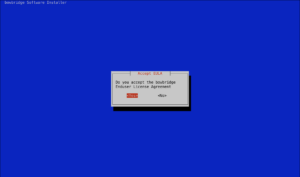
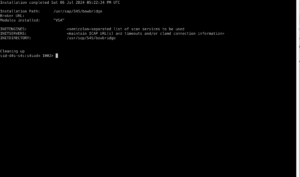
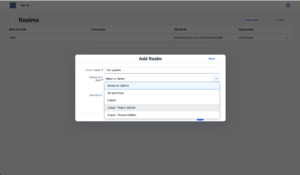
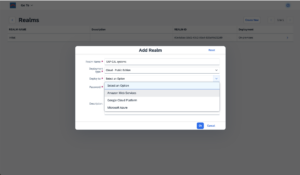
Check the bowbridge Customer PortalVerify access to the bowbridge Customer Portal and ensure the tiles “Scan Clusters” and “Logs” are visible. If they are not, please reach out to support@bowbridge.net. 3.OS-level installation3.1.Linux/UNIXInstall the VSA clientInstalling the VSA-client as SIDadm into a folder that is writable for that user. We recommend installing it to /usr/sap/<SID>/bowbridge. If a different location is preferred, please ensure the SIDadm user can access it or run the installer as the root user. Interactive installationExtract the installer with gunizp install_bowbridge_anti-virus_client_4*.sh.gz , the run the installer with sh install_bowbridge_anti-virus_client_4*.sh and follow the instructions of the installer: Confirm the splash screen. Choose “Install” Enter the target directory for the installation. Select the option “Cloud” View and accept the EULA Installation complete. Silent-mode installationAlternatively, deploy the VSA client to /usr/sap/<SID>/bowbridge silently with a single command: executed as SIDadm: sh install_bowbridge_anti-virus_client_4*.sh --silent --install --targetdir /usr/sap/$SAPSYSTEMNAME/bowbridge --install_pattern Cloud --accept_EULA or executed as root to create an installation in a folder not yet accessible to SIDadm: sh install_bowbridge_anti-virus_client_4*.sh --silent --install --targetdir /usr/sap/$SAPSYSTEMNAME/bowbridge --install_pattern Cloud --accept_EULA --sidadm 4.Customer PortalBefore configuring the SAP level, a few steps are required in the customer portal. 4.1.Set up a realmSet up a realmRealms are namespaces for configurations and SIDs. Customers may freely choose how they would like to group SAP systems (identified by the SID) in realms. Typically, system lines, geographical locations, departments, or topological proximity are good choices. From the Launchpad, access the “Realms” tile. For existing bowbridge customers, the overview page may already show an on-premises Realm named “Initial,” containing the on-premises SIDs and licenses. Create a new realm by clicking the “Create New” button. Specify a name and an optional description and choose the deployment type.
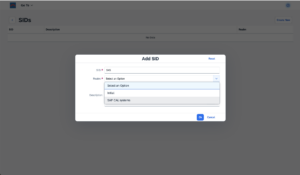
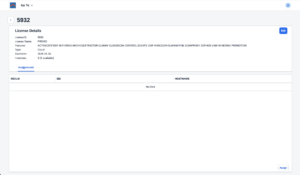
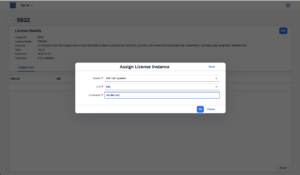
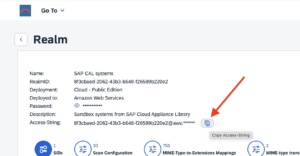
For the Hybrid and Cloud Options, a Realm access password must be provided. For the Cloud options, administrators must further choose a hyperscaler to which the Realm should be deployed. 4.2.Create a SID objectTo use the bowbridge Cloud Scan service, a system must also be registered by its SAP SID, which in turn must be assigned to a Realm. Access the SIDs tile from the Launchpad or via the “Go To” menu and click on “Create New” to register a new SID. Enter the SID and select the realm from the pulldown. An optional description of the SID may be provided, for example a description of the system’s main application. 4.3.Assign a license instanceOnly licensed application servers can use the bowbridge Cloud Scan service. An application server is uniquely identified by a realm, a SID, and a hostname. Hence, license instances must be assigned to such a parameter triad. Access the Licenses tile via the Launchpad or via the “Go To” menu. From the Licenses Overview (also referred to as License Pool) select the license you would like to assign. On the License Details page, use the “Assign” button to assign an instance of this license to an application server. NOTE: If you are unsure what hostname to use, defer this step until after the Virus Scan Provider configuration. The error message displayed on the then unlicensed application server will include the hostname to use for the license assignment. 5.AS-ABAP ConfigurationTo make content scanning transparent and highly available to any ABAP application, the SAP VSI configuration introduces three abstraction layers:
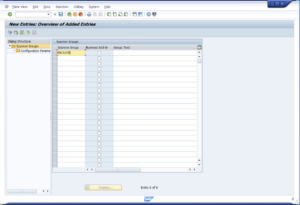
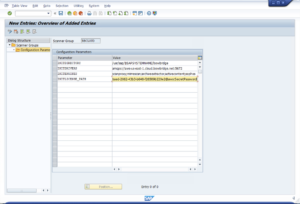
5.1.Set up a Virus Scanner GroupVirus Scanner Groups are cross-client containers for configuration parameters passed to any Virus Scan Provider included in the group. Open transaction VSCANGROUP, enable change mode, and add an entry. Provide a name for your newly created Scanner Group (“BBCLOUD”) and press the Enter key. Then select the line and open the “Configuration Parameters” element in the Dialog Structure. Create the following key/value entries: The options supported by bowbridge Anti-Virus 4 are:
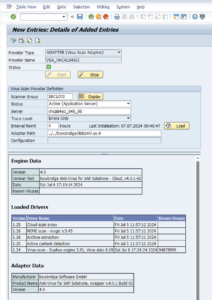
Your complete configuration should look analogous to the above. Upon saving, a Transport Request will be created, allowing you to propagate these edits to other systems of the same line. 5.2.Virus Scan ProviderVirus Scan Providers are the cross-client functional components extending the SAP kernel’s capabilities with content scanning. Open transaction VSCAN, enable change mode, add an entry, and enter the Provider details:
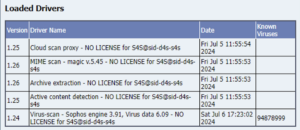
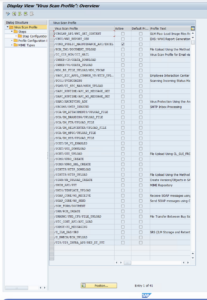
Upon saving, a Transport Request may be created, allowing you to propagate these edits to other systems of the same line. We recommend adding the changes to the same transport as the VSCANGROUP changes. Activate the Virus Scan ProviderClick the “Start” button to activate the Virus Scan Provider. The activation may take a few seconds. The Status should then show green, and details of the scan cluster’s detection modules should be displayed: 5.3.Configure Virus Scan ProfilesVirus Scan Profiles are the entry point for applications. Most Virus Scan Profiles refer to a function module. As soon as such a virus scan profile is configured and activated, all file transfers utilizing that function module will invoke the Virus Scan Interface with the parameters defined in the Virus Scan Profile. IMPORTANT: Unlike Virus Scanner Groups and Virus Scan Providers, Virus Scan Profiles are NOT cross-client. They must be configured for each client individually. Virus Scan Profiles contain one or more “Steps” and “Step Configuration Parameters” applying to only the related step, “Profile Configuration Parameters”, and a “MIME-types” table, the latter two of which apply to the entire profile. SAP delivers several Virus Scan Profiles out of the box. However, not all profiles must be maintained manually because Virus Scan Profiles can reference each other. Hence, it is best practice to maintain only two profiles, Z_AV-ONLY and Z_ADVANCED, and reference these in other profiles. Z_AV-ONLY is typically configured as a basic, anti-malware-only profile. Its use is usually recommended for non-interactive applications, such as PI/PO, incoming emails and interface traffic, like Web-services. Z_ADVANCED is typically configured as a more restrictive profile. Customers may choose to validate file types (matching of the filename extension with the file content), blocking of active content, and possibly a an allow-list or block-list of MIME-types. For more details, refer to the SAP’s documentation on the Virus Scan Interface, such as
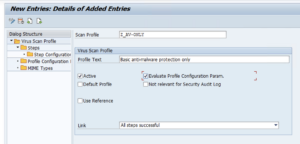
Create the Z_AV-ONLY profileGeneral profile settingsAccess transaction VSCANPROFILE and enable Change-mode, then add a new entry to the table. Name the profile Z_AV-ONLY, provide an optional description, mark the profile as “Active” and select the “Evaluate Profile Configuration Param.” checkbox.
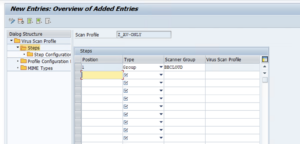
Steps
Open the “Steps” folder in the Dialog Structure pane, create a new entry and fill in the first line of the Steps table with the values
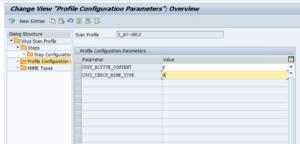
Profile Configuration ParametersOpen the “Profile Configuration Parameters” folder in the Dialog Structure pane and add the following parameters to the table:
Complete the configuration by saving the profile and registering a transport.
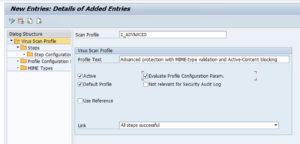
Create the Z_ADVANCED profileGeneral profile settingsAccess transaction VSCANPROFILE and enable Change-mode, then add a new entry to the table. Name the profile, provide an optional description, mark the profile as “Active” and “Default Profile” and select the “Evaluate Profile Configuration Param.” checkbox.
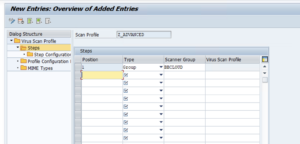
Steps
Open the “Steps” folder in the Dialog Structure pane and fill in the first line of the Steps table with the values
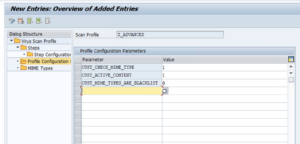
Profile Configuration ParametersOpen the “Profile Configuration Parameters” folder in the Dialog Structure pane and add the following parameters to the table:
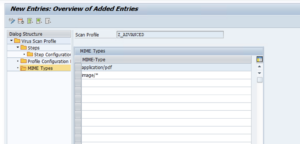
MIME-typesIf the application already limits allowed file types by extension, the file-format validation activated as part of the CUST_CHECK_MIME_TYPE parameters provides a solid level of protection against file-type filter bypass attacks. Customers may, however, decide to maintain two separate layers of filtering. They may then maintain a list of allowed (or disallowed) MIME types in the MIME Types table.
NOTE: Because white lists and black lists are mutually exclusive, SAP only provides one table of MIME types to maintain per profile. By default, the table is treated as a white list once it has at least one entry. That behavior can be switched to a black list by setting the CUST_MIME_TYPES_ARE_BLACKLIST parameter to “1” in the Profile Configuration Parameters folder.
Complete the configuration by saving the profile and registering a transport.
Activate relevant virus scan profilesin the Administration Guide to Implementation of SAP S/4HANA Cloud Private Edition 2023 with SAP Best Practices, SAP recommends activating ALL virus scan profiles, enabling most of them to use the more restrictive Z_ADVANCED profile (referred to as “ZEXTENDED” in the SAP guide) and only map a few ones to the Z_AV-ONLY profile (referred to a “ZBASIC” in the SAP guide). In contrast to the SAP guide, we recommend that customers reference Z_ADVANCED in the HTTP_UPLOAD profile while using Z_AV-ONLY for GUI_UPLOAD, which is usually sufficient. Nowadays, SAP-GUI connections are mainly used for administrative tasks, while Web-enabled applications provide a larger attack and exploit surface, for example, Cross-Site Scripting with active content.
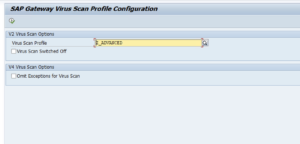
5.4.SAP Gateway Virus Scan Profile ConfigurationFor FIORI applications to be able to leverage the Virus Scan Interface, malware scanning must be activated at the SAP Gateway level, too. Access the SAP Gateway Virus Scan Profile Configuration in transaction /n/IWFND/VIRUS_SCAN and ensure Virus Scan is not switched off. Administrators may choose to explicitly reference a Virus Scan Profile in the respective field. Leaving the field empty will reference the default Virus Scan profile.
NOTE: To persist changes in /IWFND/VIRUS_SCAN, do NOT use the “Save” button, but use the “Execute” button For more details regarding malware scanning at the SAP Gateway, pls refer to the SAP Gateway Foundation Guide
5.5.Validate the configurationSAP AS-ABAP has a built-in option to test and validate the VSI configuration at each of the abstraction levels (Virus Scan Provider, Scanner Group, Virus Scan Profile).
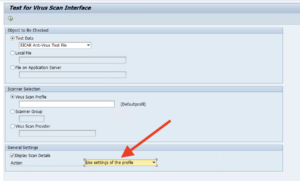
Access the Test for Virus Scan interface transaction VSCANTEST The functionality is fairly intuitive, only make sure to always select “Use settings of the profile” when testing, in order to prevent unexpected (yet correct) results. Tests could include scanning:
NOTE: Most administrators will not be able to store real malware on their computers. They may use the “EICAR Anti-Virus Test File” to test the malware detection part of the configuration. That file is not real malware, but by convention, all anti-virus engines detect it as if it were.
Ultimately, test file transfers from your applications and monitor the scans in the “Logs” tile of the customer portal.
6.AS-Java ConfigurationTo make content scanning transparent and highly available to any Java application, the SAP VSI configuration introduces three abstraction layers:
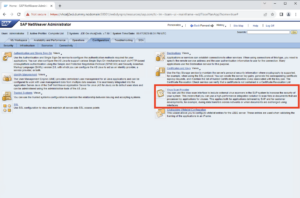
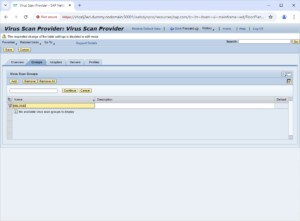
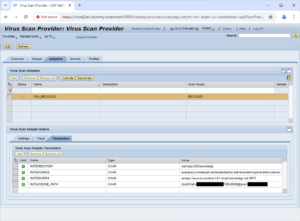
These layers are reflected in the configuration steps that need to be performed in NetWeaver Administrator (NWA). They are maintained from the Virus Scan Provider section in the Netweaver Administrator’s Configuration Tab. 6.1.Set up a virus scanner groupVirus Scan Providers with identical configurations are grouped in a Virus Scanner Group. However, even with only one Virus Scan Provider, a Scanner Group containing just this element must be created. In the Group Tab of the Virus Scan Provider management, Edit, then add/change a Virus Scan Group. Creating an empty group and marking it as default is sufficient 6.2.Set up a virus scan providerOpen the “Adapters” tab in edit mode and add a new Virus Scan Adapter. Pls note the name of the provider must start with “VSA_” Link it to the newly created group, set the re-init interval to a value between 0 and 24 hours. This parameter specifies the interval in which the Virus Scan Adapter will automatically re-initialize and reload its (potentially updated) configuration from the cloud management. For “Maximum Instances”, choose a value that is at least equal to the number of Java threads in your server process. For the VSA Library Path, provide the fully qualified path to the libbbAV,so.4 library. The library is located in your bowbridge installation folder. So, if you installed the client to /opt/bowbridge, the resulting path would be /opt/bowbridge/libbbAV.so.4 Once created, open the “Parameters” tab of the virus scan adapter and maintain the parameters as below:
After saving the settings, the Adapter settings should validate and show as green:
and the Adapter should activate.
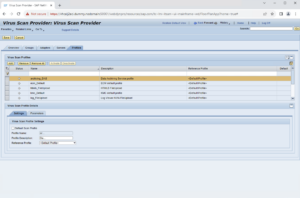
6.3.Set up Virus Scan ProfilesVirus Scan Profiles are a set of parameters specifying how a scan will be performed. Their names reference Java methods in which the Virus Scan Profile name is hard-coded. During the execution of such methods, scans are automatically performed with the profile settings if the profile is marked as active. The profile defines one or more “Steps,” invoking a virus scan provider from a Virus Scanner Group or referencing another Virus Scan Profile. For example, if the htmlb_FileUpload profile is active, then any file upload via HTTP will be scanned with the settings of the htmlb_FileUploadprofile profile. This is fully transparent to the application using the function module and works without any application changes. SAP delivers several virus scan profiles, which are mostly empty. In their default configuration, they reference the so-called “Default Profile.” There are, therefore, two ways to manage Virus Scan Profiles effectively:
In either case, the profiles contain the following parameters:
Use the Parameters tab to fine-tune the scan settings of the virus scan profile:
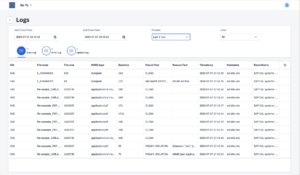
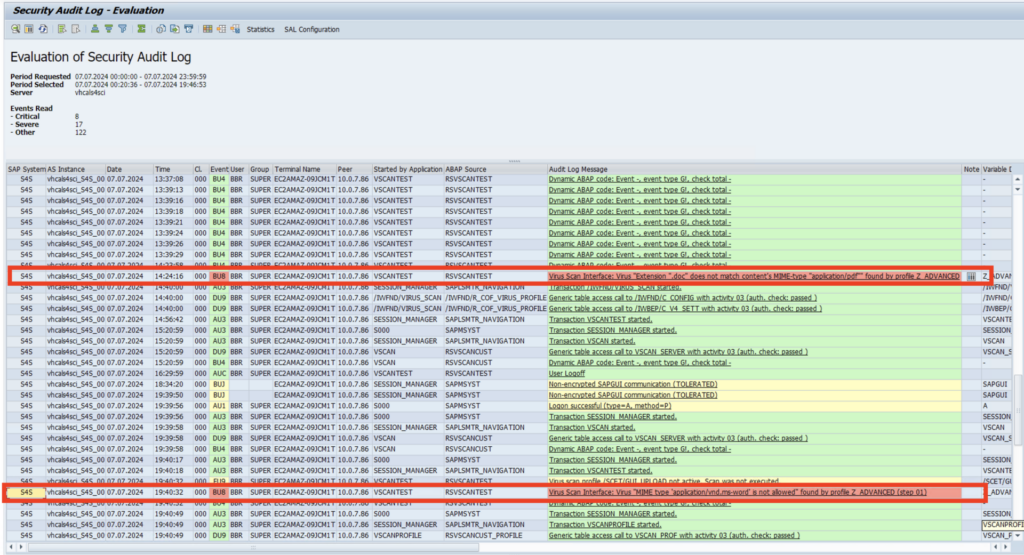
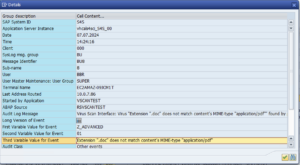
7.Logs, Alerts, QuarantineLogsSeveral logs are available to track scanning activity. The most complete log is the bowbridge Scan Log, which can be viewed in the Customer Portal. It logs every scan operation. Additionally, a separate Error Log is available, and for Private-Edition dedicated clusters, an Update Log stores information about malware definition updates and software binary updates. Additionally, every scan resulting in the blocking of a file generates an entry in the SAP security audit log. For blocked files, the SAP security audit log stores context information, such as the user, the terminal name, and the IP address, which is not available to the Virus Scan Provider and can therefore not be logged in the Scan Log:
AlertsThere are several ways to implement alerting.
Both are beyond the scope of a quick-start guide. Please refer to the integration guide for details on implementing this service or contact your bowbridge consultant or bowbridge support. QuarantineIf a file is blocked by the Virus Scan Provider, SAP’s default behavior is to discard the file. It is then lost. However, it may be of interest to retain a copy of that file, for example for forensic analysis or for data reconstruction, if the blocking of the file was deemed a false positive. bowbridge Anti-Virus includes a quarantine option allowing customers to receive copies of files blocked by the service in a secure container (password-protected and encrypted ZIP archive), along with a text file detailing the reason why the file was blocked. Implementing a quarantine client is beyond the scope of a quick-start guide. Please refer to the integration guide or contact your bowbridge consultant or bowbridge support for details. |
||||||||||||||||||||||||||||||||||||||||||||||||||||||||||||||||||||||||||||||||||||||||||||||||||||||||||||||||||||||||||||||||||||||||||||

